Board View
Let’s focus on the Board View first. The Board View is the control center for you hardware controller – it should always reflect the state that your Arduino or similar board is in right now. You have to tell blokdots, what component is connected to which pin or slot. No worries, blokdots will help you with that! Let's go through the process, step-by-step.
Connecting a Board
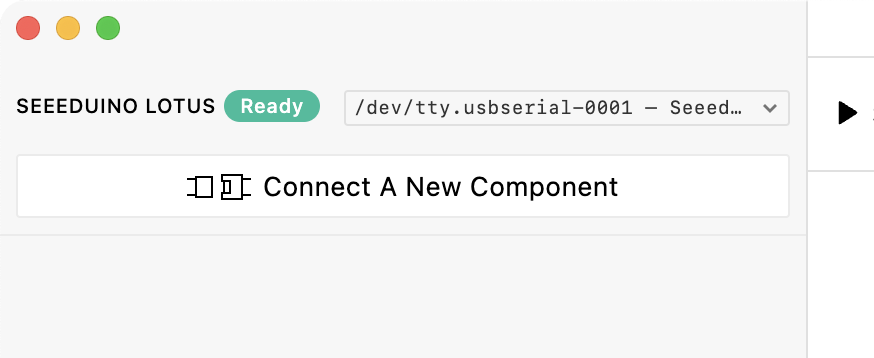
The very top left corner of the app is reserved for information about your board. Here you can see what board is currently connected to blokdots, at which port it is connected, and the status of the board.
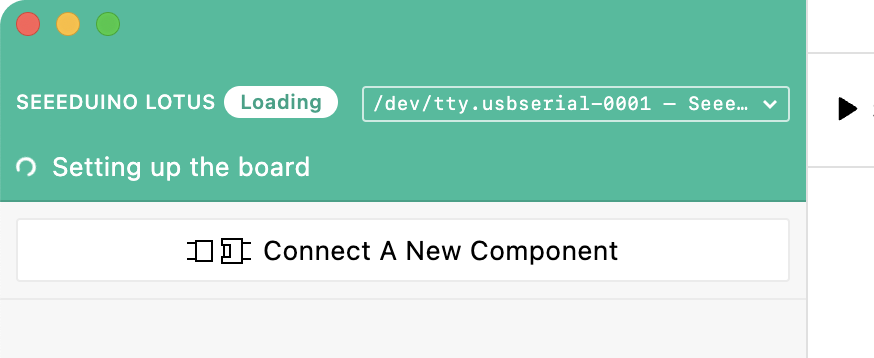
When you plug in a supported board, blokdots detects it automatically and should set it up with the correct firmware needed for blokdots to run. During this process, the area is green.
Usually if you have a board connected, it should display "Ready." This indicates that everything should work as expected.
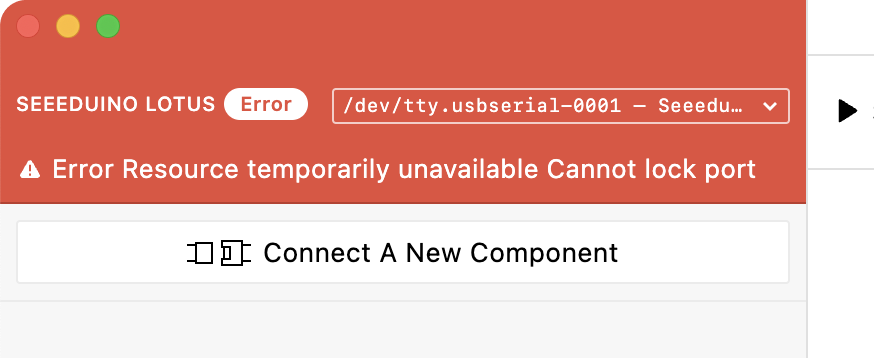
If there is an error with your board, the area will turn red to let you know that there is something wrong. No worries, in most cases this is resolved by unplugging and replugging the board to your computer. Should it still not work, please check the Hardware page as some boards have specific requirements.
Connecting a Component
To connect a component, click on the "Connect A New Component" button in the top left. A window pops up with a list of components on the left and a visualization of your board on the right.
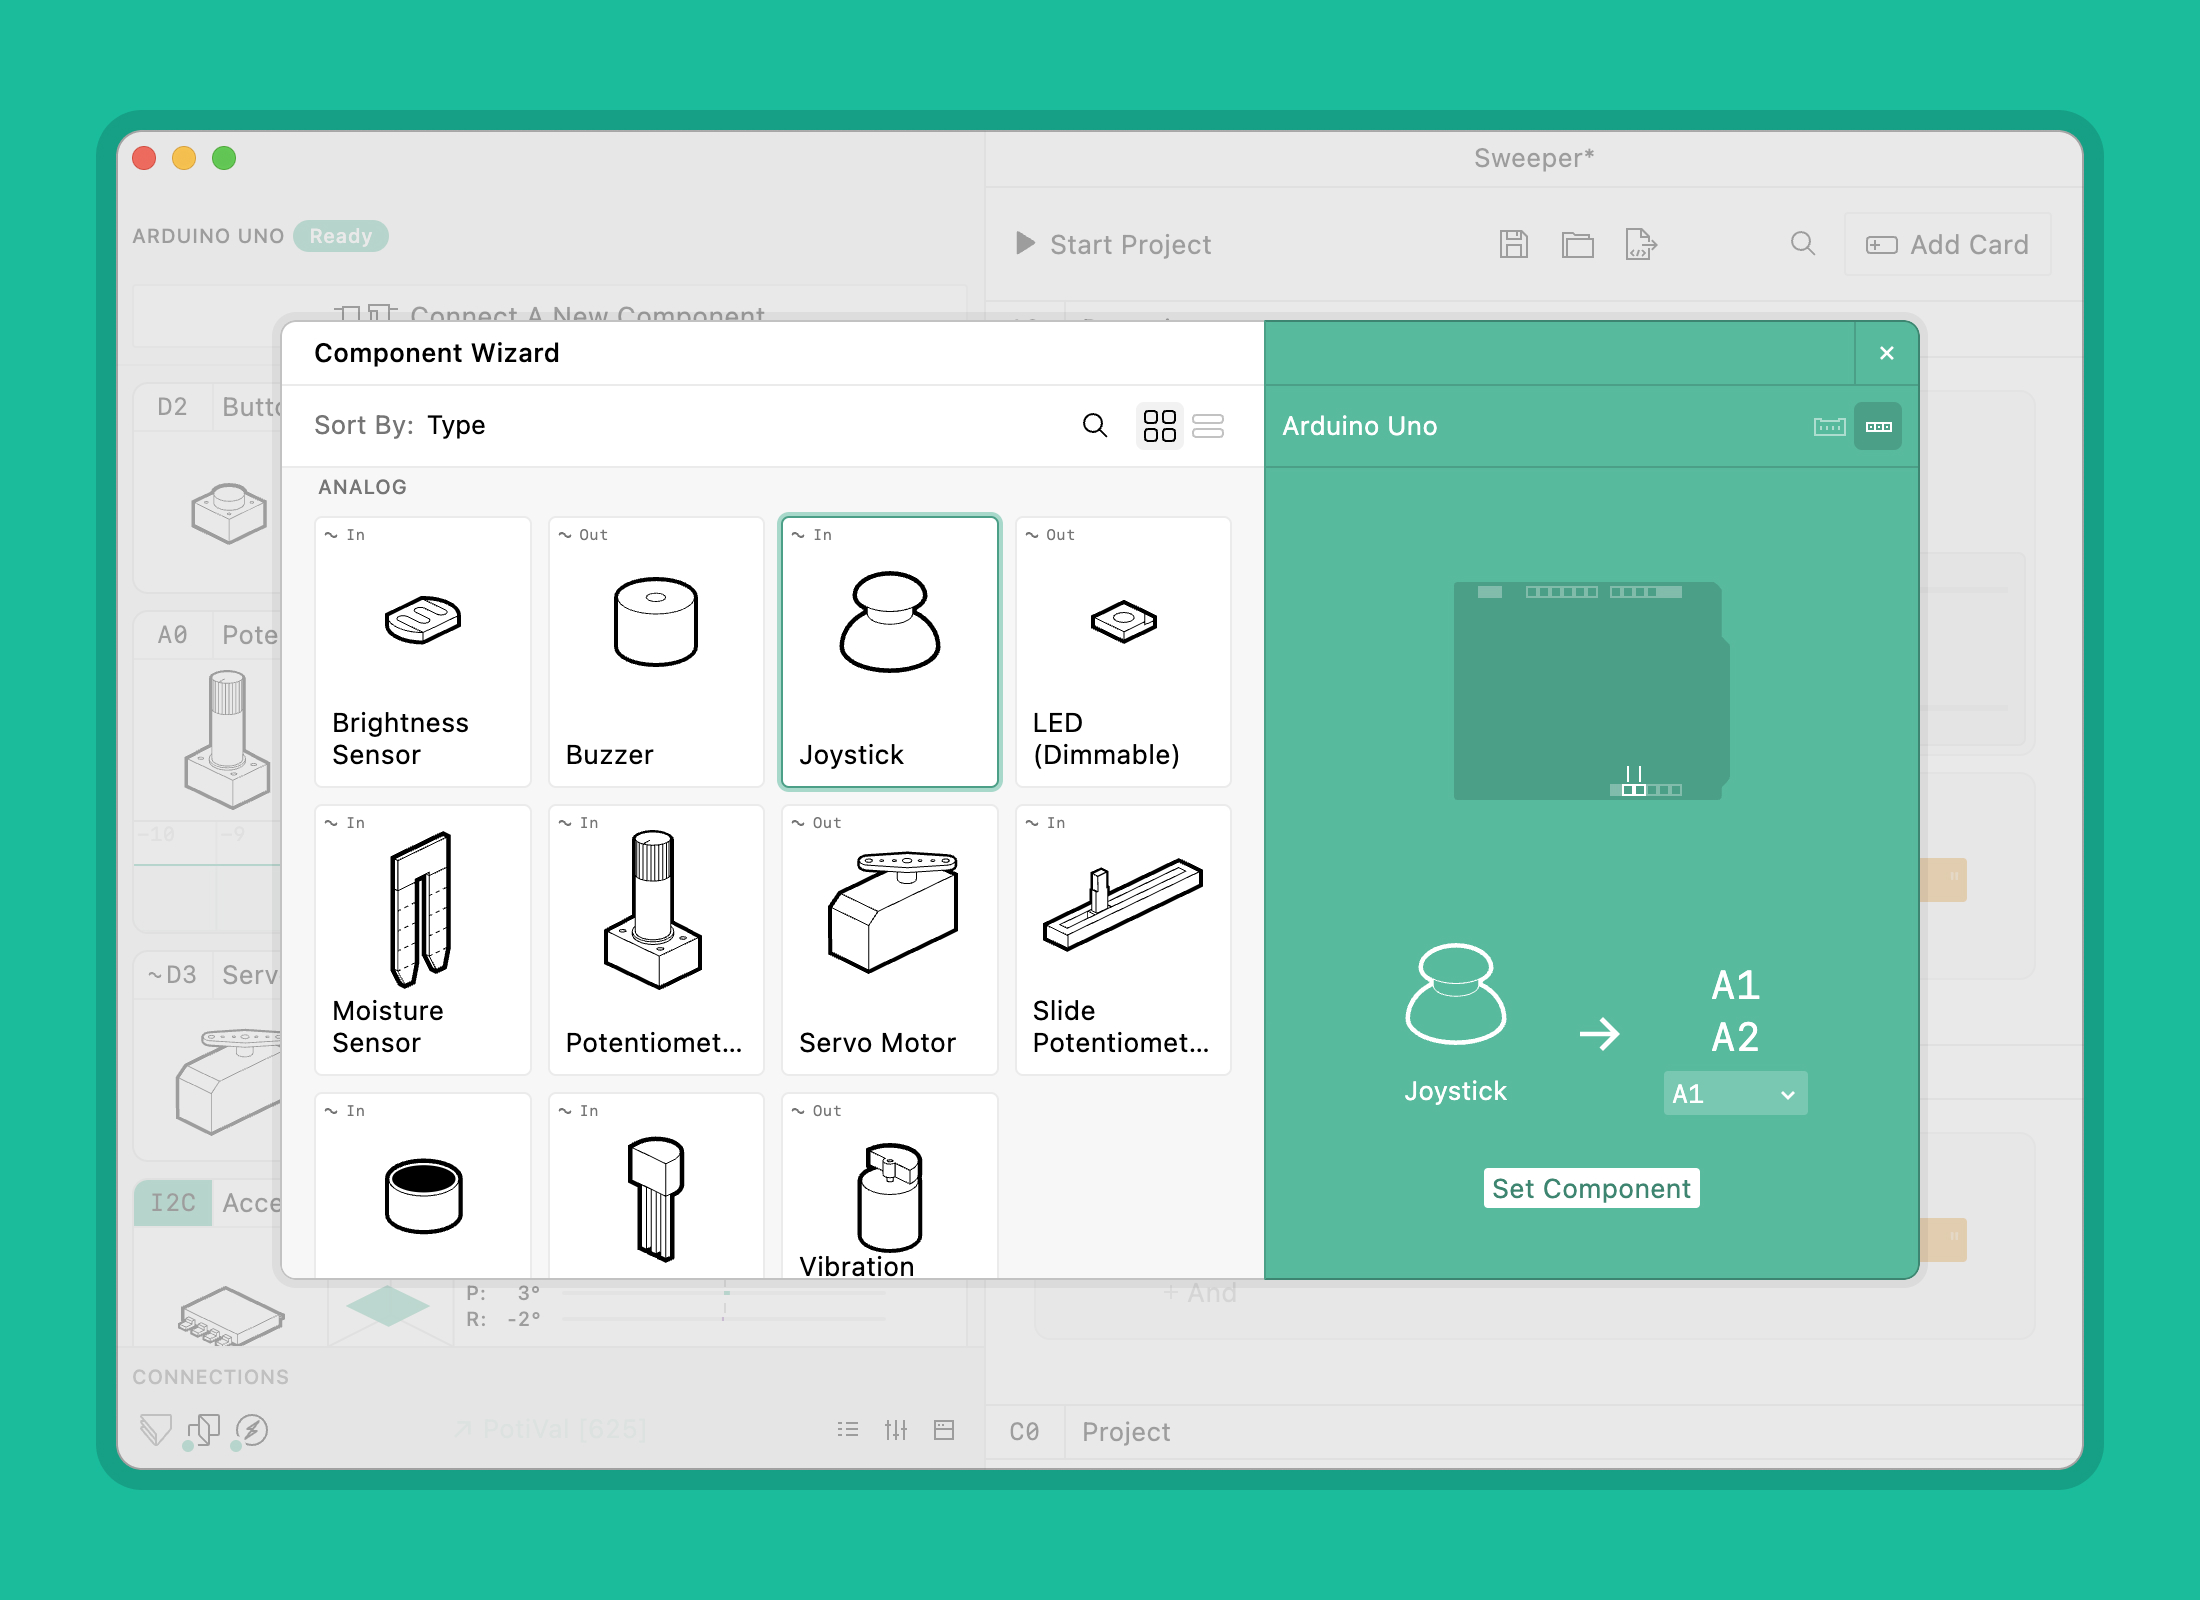
Supported Component List
On the left you can find all components that blokdots currently supports. You can browse through it to find the component you want to connect, or search for it at the top. You can dive into each component's features directly in the app by clicking on the small "i" in the top right corner of the component card. Of course, you can find the same information here on this page also.
Board Map
Once you have selected a component, you will see on the right where there is a fitting slot left on the board. The board updates itself automatically once connected.
At the top right corner of the board map, you can select between a "Slot" and "Pin" layout. The "Slot" layout refers to the Grove shields by Seeed Studio, while the "Pin" layout displays the IO pins of the board. There is no difference in the setup itself, it is simply supporting the view you prefer or work with at the moment.
On some boards if the "Slot" layout is selected, you can also select which Grove shield you are using, as some boards support multiple shields.
Component List
If you have components set up, they appear in the list on the left. Each component consists of its basic information like the component name, the connected data pin, and a value display.
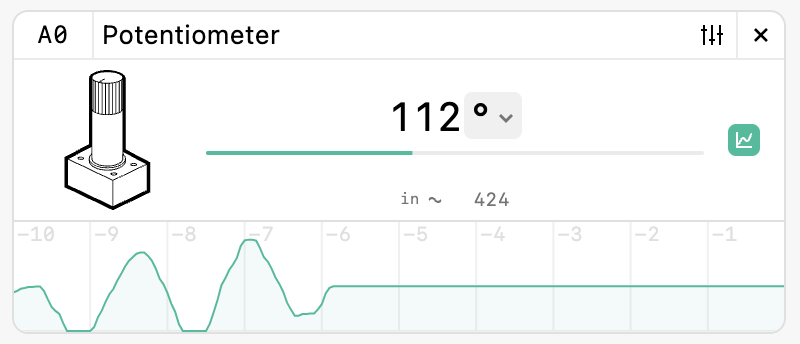
Displaying the Current Value
The value display adapts to each component. For sensors this display is a mere display of the currrent value it is reading. For actuators you can control the component from here right away. Some components have very specific displays as they behave quite uniquely.
For some components you can change the unit in which the value is displayed. Click on the unit symbol next to the value to change it.
For components with numeric values, you can also show a graph with the recent values of the last 10 seconds. You can find the button on the right of the components.
Additional Component Controls
Some components have also very unique additional controls that you can find also on the right.
Component Options
For every component you can also open its options at the top right next to the "×". With the options you can configure the exact behavior of the component. Most options show a little "i" symbol next to their title. Move your pointer over it to see a tooltip describe exactly what the option does.
Removing a component
If you intend to remove a component, simply click on the "×" button at the top right of the component. If it is currently used in your project, an alert pop-up will appear.
Connections
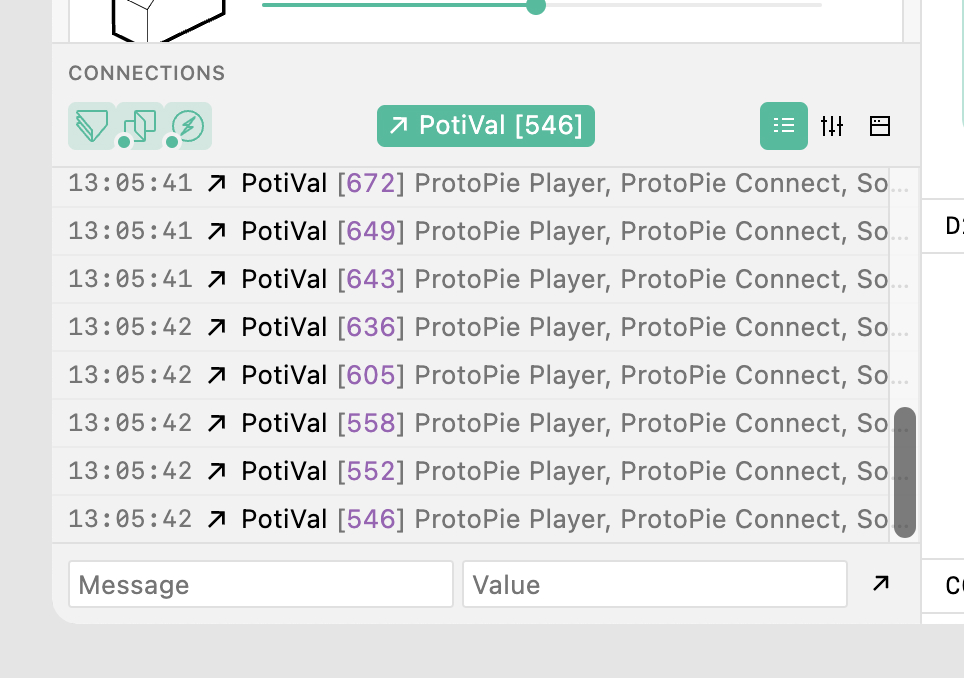
At the very bottom of the component list, you can find the connections. Connections are set up automatically and connect to outside apps like ProtoPie.
Here you can see what connections are currently connected and get a log of the most recent messages.
Board View Shortcuts Overview
- cmd ⌘shift ⇧NConnect A New Component